How to Drill Ceramic, Marble, and Granite
Drilling ceramic could be a challenging task considering its hard material and can easily crack with incorrect drilling techniques. It is advised to always drill on the grout lines than on the pieces. However, if it is not feasible, you will need to follow this technique instruction to prevent ceramics from cracking. The dust resulted from the drilling process can blur the color of the grout lines, thus a vacuum cleaner may be needed for cleaning purpose.
Tools and materials:
- Paper tape
- Marker
- Hand drill machine
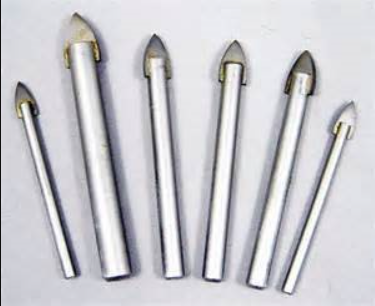
- Ceramic and concrete drill bits
- Fisher
These are the following steps for drilling ceramic walls according to DIY Quick Fix (Julian Cassell, et al), 2008, published by DK Publishing:
Step 1
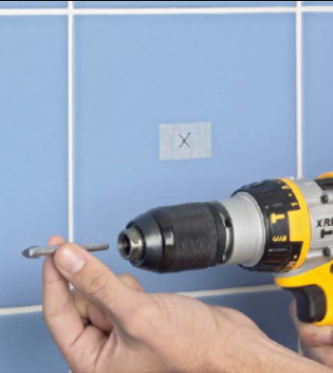
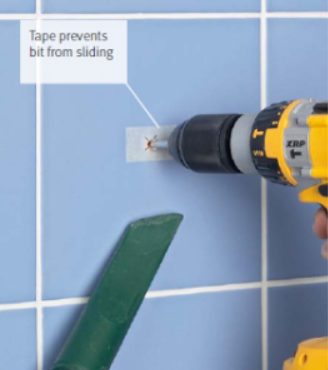
Use marker to mark the drilling spot. Place a paper tape on top of the marked spot.

Step 2
Select the appropriate ceramic or concrete drill bit for your desired hole size and material. Then, insert into the hand drill machine.
Step 3
Place the vacuum cleaner below the marked spot and turn it on. Then, start drilling in a low RPM and applying light and steady pressure. It is important to keep the drill bit perpendicular to the wall surface to avoid chipping or cracking the ceramic.
Step 4
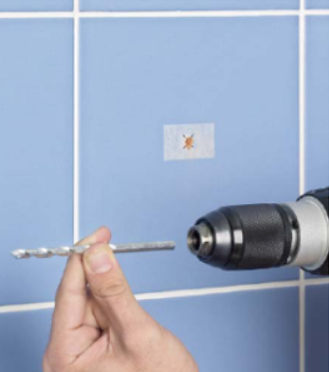
When the ceramic hole has been drilled, replace it with a concrete drill bit that matches the size of the screw you want to use. Continue drilling until you reach the desired depth or complete the hole.
Step 5
Remove the paper tape and insert a wall anchor into the drilled hole.

Source of text and images: DIY Quick-Fix, Julian Cassell, et al. 2008, DK Publishing.